Introduction
Welcome to the WhatsApp settings documentation for Swiftsell. This guide will walk you through the complete process of setting up your WhatsApp Business integration, including obtaining the required credentials from Meta’s developer platform.Prerequisites
Before you begin, ensure you have:- A WhatsApp Business account
- Access to Meta for Developers (https://developers.facebook.com/)
- Admin access to your Facebook Business account
- A verified phone number for your business
Step 1: Collect Required Credentials and Configure Swiftsell
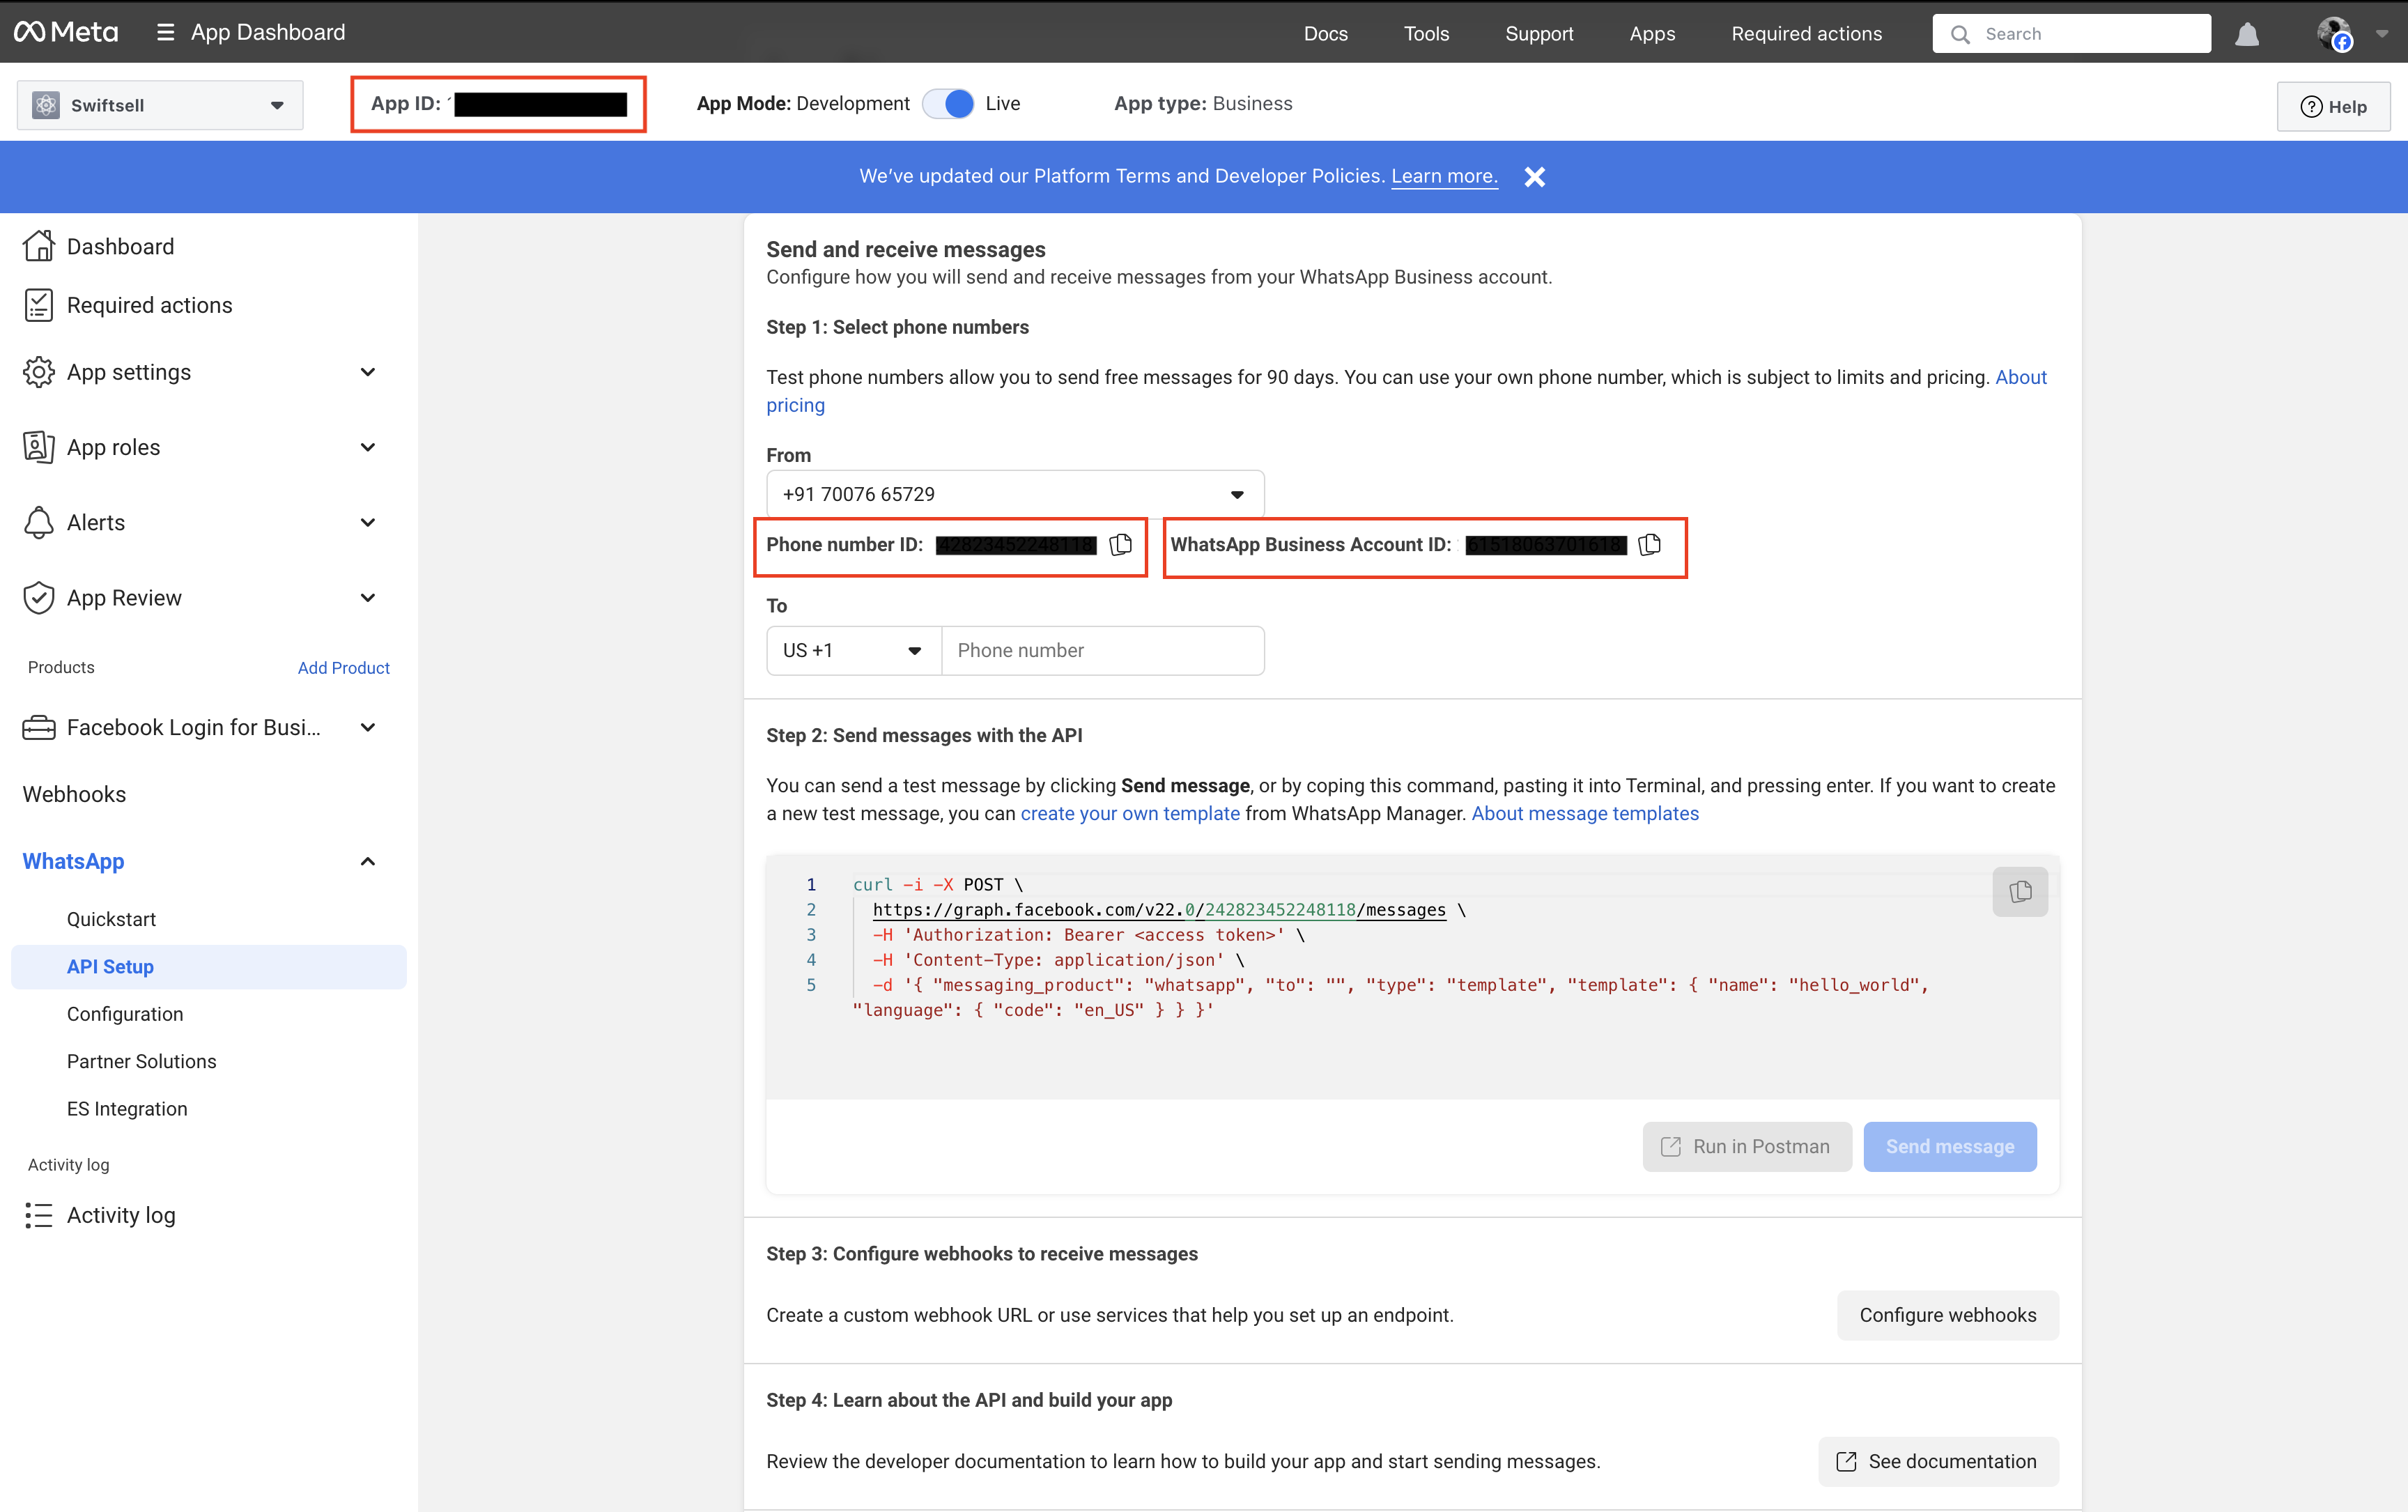
First, you’ll need to collect three important pieces of information from your Meta for Developers dashboard:Access Meta for Developers
- Go to Meta for Developers
- Log in with your Facebook account
- Navigate to “My Apps” or create a new app if you haven’t already
- Select your existing app or create a new “Business” type app
- Add the WhatsApp product to your app
- Navigate to the WhatsApp > API Setup section
Collect Credentials
Configure Swiftsell
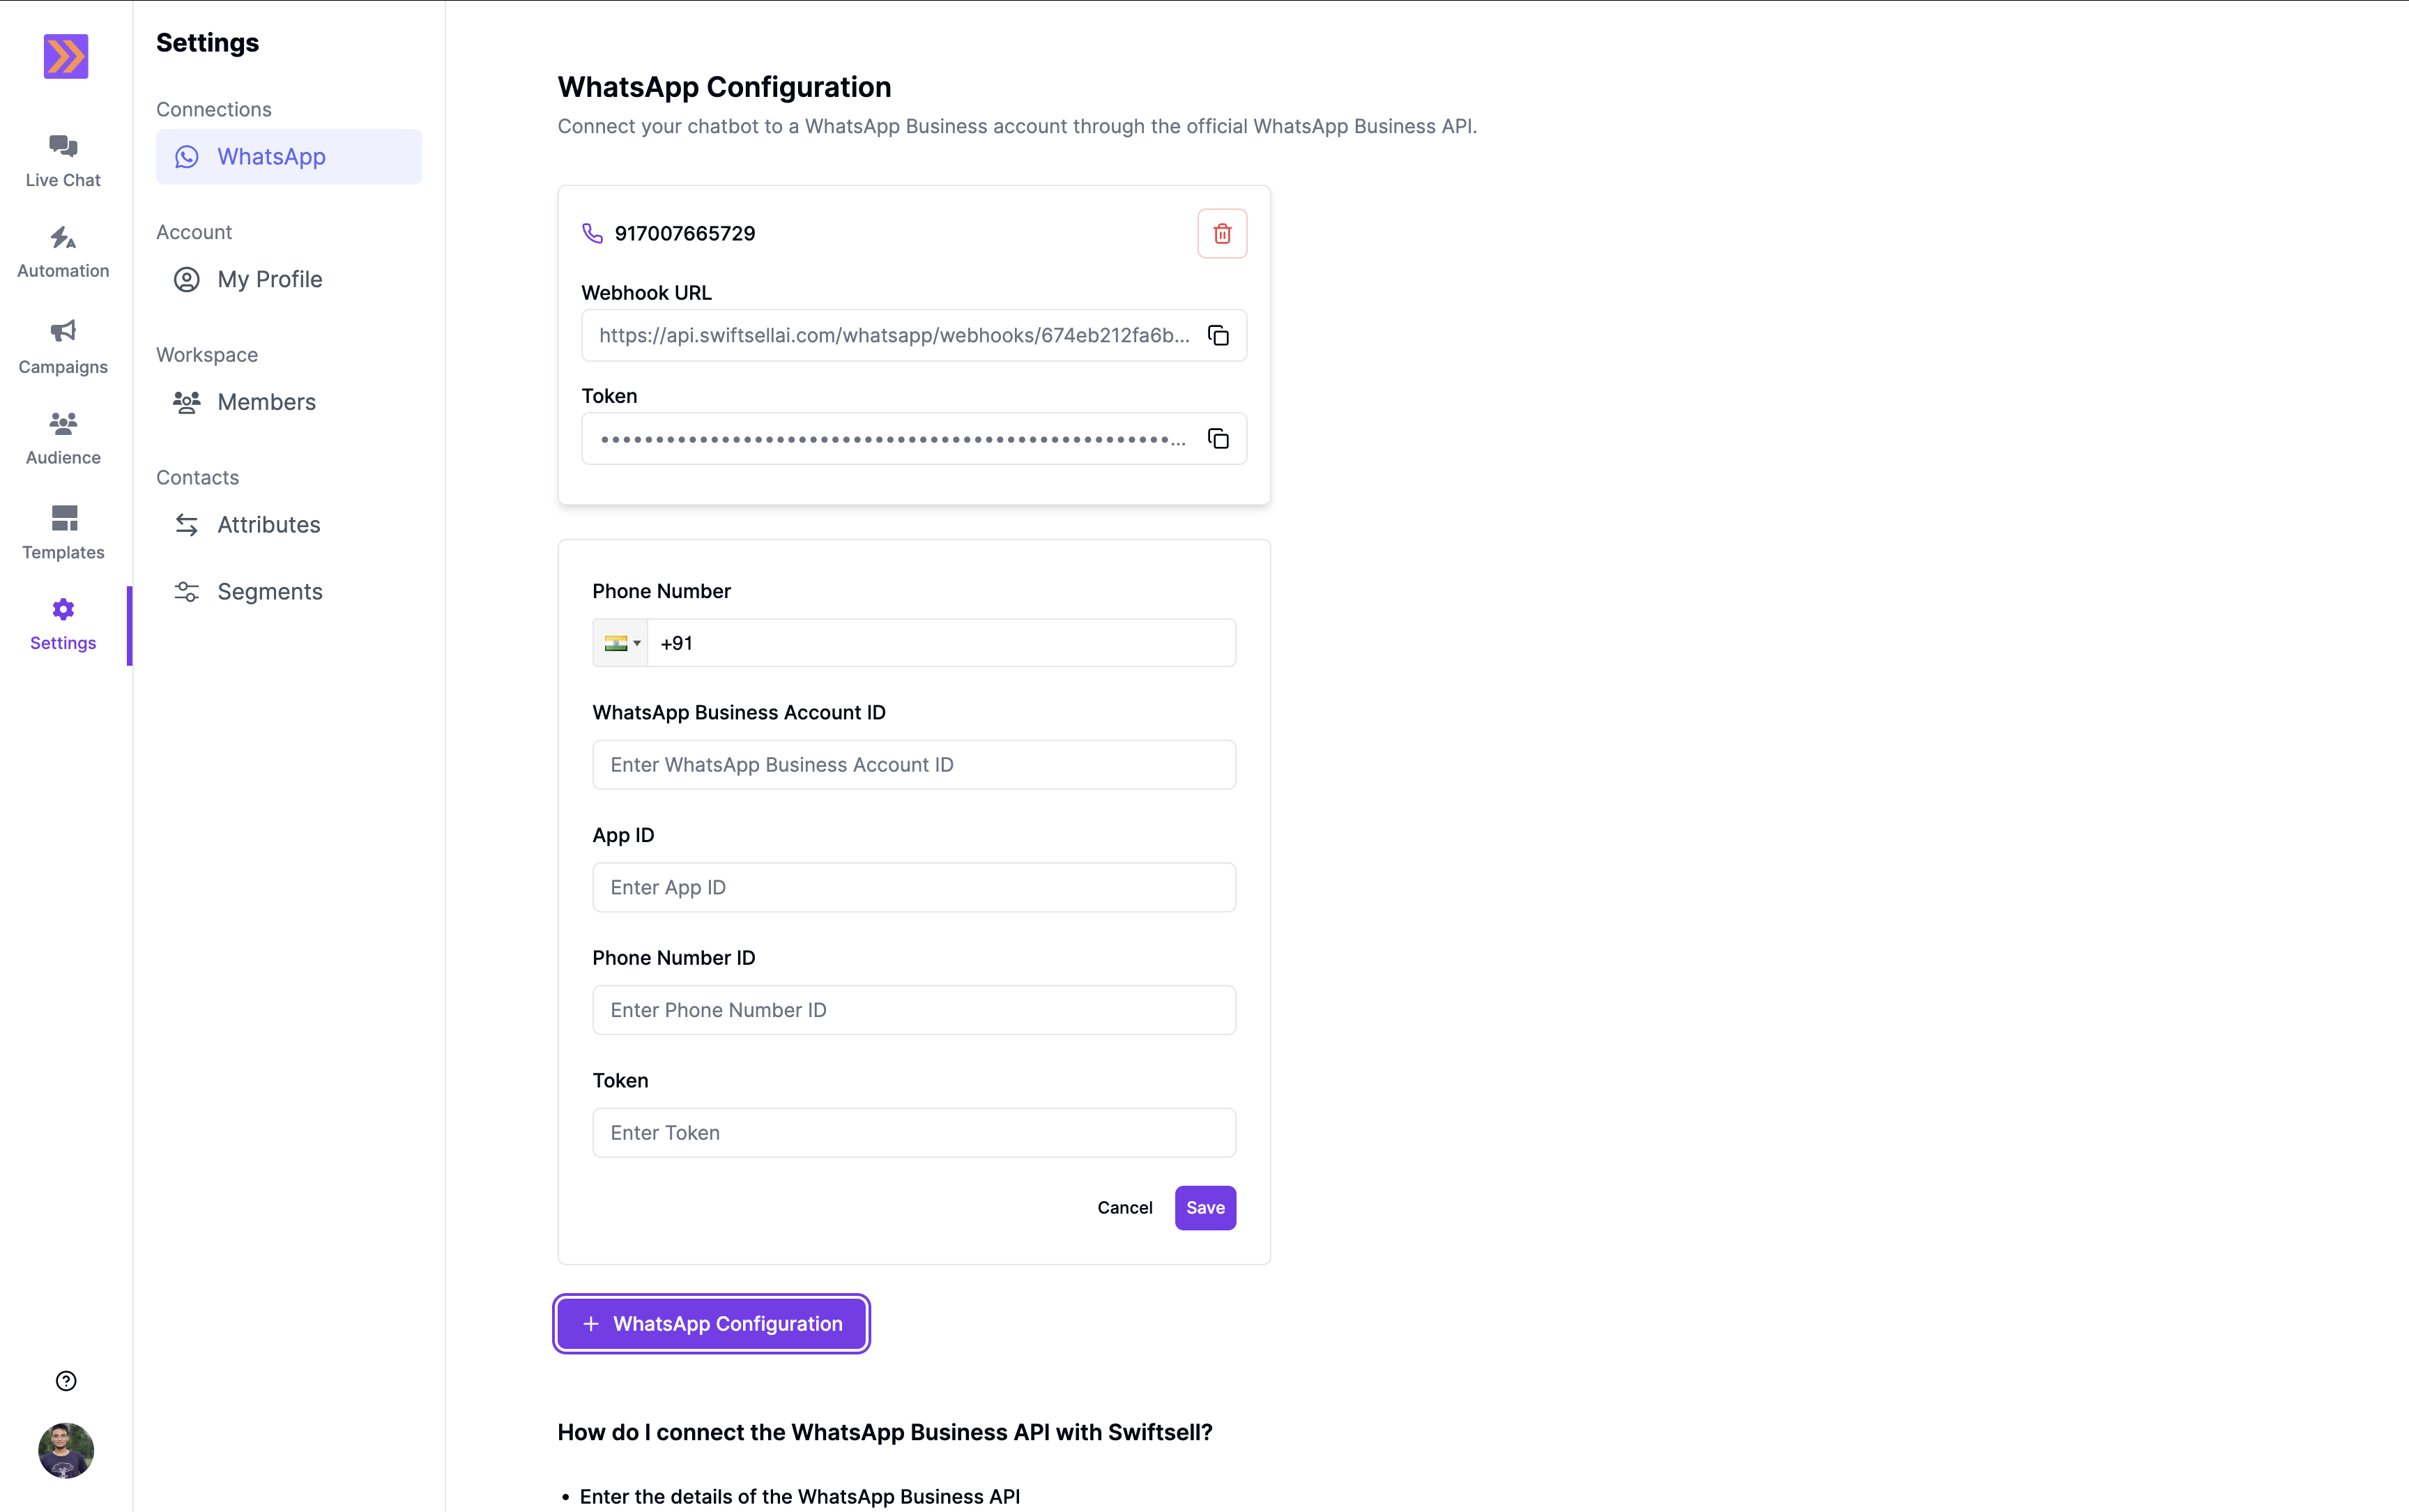
- Navigate to Settings > WhatsApp in your Swiftsell dashboard
- Click + WhatsApp Configuration to open the connection form
- Enter your WhatsApp Business Phone Number in the designated field
- Enter your App ID in the designated field
- Enter your Phone Number ID in the corresponding field
- Enter your WhatsApp Business Account ID in the designated field
Step 2: Create System User Access Token
You need to create a permanent system user access token for API access. System tokens are long-lived and can represent automated services within your business.Access Business Settings
- Go to Meta Business Suite
- Log in with your Facebook account
- Locate your business portfolio in the top-left dropdown menu
- Click the Settings (gear) icon next to your business portfolio name
Create System User
- In the Business Settings panel, click System Users in the left sidebar under “Users”
- Click the +Add button
- In the Create system user window:
- Enter a system user name (e.g., “SwiftSell Integration”)
- Assign it an Admin role (recommended for full access to all WABAs)
- Click Create
Assign App Assets to System User
- Once the system user is created, click on the system user’s name to open the asset assignment overlay
- Click the Assign assets button
-
In the Select assets and assign permissions window:
- Select your WhatsApp Business App
- Grant the system user Manage app permission
- Click Assign assets to confirm
- Important: Reload the page and wait a few minutes for permissions to be granted. The system user should show Full control of your app.
Generate Access Token
- In the asset assignment overlay, click the Generate token button
-
In the token generation window:
- Select your WhatsApp Business App from the dropdown
- Choose a token expiration preference (60 days or Never expire - recommended)
- Select the following Graph API permissions:
business_managementwhatsapp_business_managementwhatsapp_business_messaging
- Click Generate token
- Critical: Copy the generated token immediately and store it securely - you won’t be able to see it again
- Add this token to the Token field in your SwiftSell configuration form
Step 3: Save Configuration and Set Up Webhook
- Complete all fields in the SwiftSell WhatsApp configuration form
- Click Save to save your configuration
- After saving, SwiftSell will provide you with:
- Webhook URL (e.g.,
https://api.swiftsell.com/whatsapp/webhooks/674eb212f6b...) - Verify Token (a unique token for webhook verification)
- Webhook URL (e.g.,
Configure Webhook in Facebook App
- Return to your Meta for Developers dashboard
- Navigate to WhatsApp > Configuration
- In the Webhooks section:
- Enter the Webhook URL provided by SwiftSell
- Enter the Verify Token provided by SwiftSell
- Select the following webhook fields:
messages
- Click Verify and Save
- Subscribe to webhook events by clicking Manage and selecting your webhook fields
Step 4: Test Your Connection
- Use the “Send message” button in the Meta developer dashboard to send a test message
- Verify that messages are being received in your SwiftSell dashboard
- Try sending a message from SwiftSell to confirm bidirectional communication
- Check that message status updates (delivered, read) are working correctly
Next Steps: Once your WhatsApp integration is configured, you can start creating Automation workflows, Message Templates, and Campaigns in SwiftSell.